Personalized Introduction
There are some appetizers that quietly sit on the table, and then there are appetizers that seem to disappear the moment you put them down. For me, homemade cheese balls definitely belong in the second category. If you are looking for something creamy, cheesy, savory, and easy to share, this cheese balls recipe is one I always love having ready.
Have you ever been getting ready for a party and realized you need one more appetizer? That is when I reach for this recipe. You do not need complicated ingredients, and you can prepare it ahead of time. The hardest part is probably waiting long enough for the cheese mixture to chill!
These cheese balls are creamy in the center, packed with cheddar and flavorful seasonings, and coated with crunchy nuts and fresh herbs. Every bite gives you that wonderful combination of smooth cheese and a little crunch.
I also love how flexible they are. You can make one large cheese ball for a holiday table, several small cheese balls for a party platter, or even tiny bite-sized cheese balls for an appetizer buffet. Add crackers, toasted bread, pretzels, vegetables, and your favorite dip, and suddenly you have a beautiful snack spread without spending hours in the kitchen.
Whether you are preparing food for Christmas, Thanksgiving, New Year’s Eve, game day, a birthday party, or a casual family gathering, this is one of those recipes that fits right in.
Recipe Origin & Story
The cheese ball has become a classic American party appetizer, especially popular for holiday entertaining. Its appeal is easy to understand: cheese is mixed with flavorful ingredients, shaped into a ball, chilled until firm, and coated with something crunchy or colorful.
Over the years, families have created their own versions. Some use sharp cheddar, others prefer cream cheese and herbs, while some add bacon, green onions, olives, jalapeños, or dried fruit.
I think that is part of the fun. A cheese ball does not need to be perfect or complicated. It is the kind of recipe that welcomes your personal touch.
My favorite approach is to start with a creamy cream-cheese base, add sharp cheddar for plenty of flavor, then bring everything together with garlic, green onion, Worcestershire sauce, and a little paprika. Finally, I roll it in chopped pecans and fresh parsley.
The result is creamy, crunchy, savory, and just salty enough to make you reach for another cracker.
And if you are entertaining, you can make it the day before. That means one less thing to worry about when your guests arrive.
Ingredient Spotlight
- Main Star: Cream cheese creates the smooth, creamy foundation that holds the cheese ball together. Sharp cheddar adds a stronger cheese flavor and a beautiful texture.
- Secret Boost: A small splash of Worcestershire sauce gives the cheese mixture a savory depth that you may not immediately identify, but you will definitely notice when it is missing.
- Quality Tips: Use full-fat cream cheese for the best texture, and choose freshly shredded cheddar when possible. Freshly shredded cheese blends more smoothly than many pre-shredded varieties.
Cream cheese: Let it soften at room temperature before mixing. This makes it much easier to combine with the other ingredients without leaving lumps.
Sharp cheddar: Sharp cheddar gives the cheese ball plenty of personality. Mild cheddar works too, but sharp cheddar provides more flavor with the same amount of cheese.
Green onions: These add freshness and a gentle onion flavor without overwhelming the creamy cheese.
Garlic: Just a little garlic adds warmth and makes the appetizer taste more savory.
Pecans: Chopped pecans create a wonderful crunchy coating. Walnuts, almonds, pistachios, or even sunflower seeds can be used instead.
Fresh parsley: Parsley adds color and a fresh finish that balances the richness of the cheese.
Nutritional Benefits
This is definitely an appetizer designed for enjoyment, but several ingredients still offer useful nutrients.
Cheese provides protein and calcium, while green onions and parsley contribute vitamins and plant compounds. Pecans also provide healthy unsaturated fats and some fiber.
If you want to make the appetizer lighter, serve smaller portions with plenty of fresh vegetables. Crisp cucumber slices, bell peppers, carrots, celery, and cherry tomatoes make excellent alternatives to serving only crackers.
You can also reduce the amount of cheese-ball coating and use a mixture of nuts and fresh herbs for extra texture.
The key with a rich appetizer like this is portion size. A small scoop alongside vegetables and crackers is a satisfying addition to a larger meal or party spread.
Adaptable Variations
- Dietary Swaps: Use dairy-free cream cheese and dairy-free shredded cheese for a dairy-free version. For a gluten-free option, serve with gluten-free crackers, vegetables, or gluten-free bread.
- Flavor Twists: Add cooked crumbled bacon, chopped jalapeños, dried cranberries, olives, roasted red peppers, smoked paprika, or fresh chives.
- Seasonal Spins: Add dried cranberries and pecans for a festive holiday version, fresh herbs and lemon zest for spring, roasted peppers for summer, or caramelized onions and herbs for autumn.
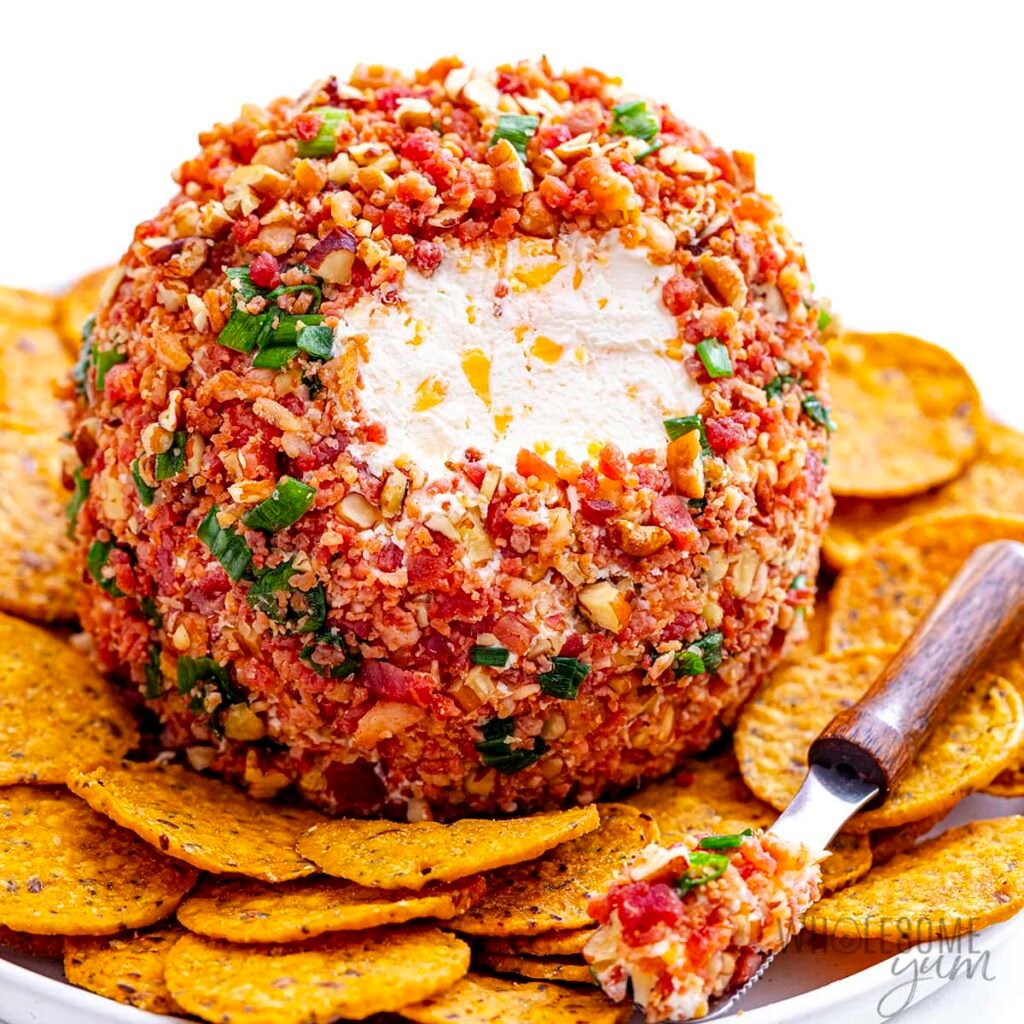
Bacon Cheddar Cheese Ball: Add about 1/2 cup cooked and finely crumbled bacon to the cheese mixture.
Jalapeño Cheese Ball: Add one or two finely chopped jalapeños. Remove the seeds and membranes if you want less heat.
Everything Bagel Cheese Ball: Replace the nut coating with everything bagel seasoning for a completely different flavor.
Holiday Cheese Ball: Coat it with chopped pecans, dried cranberries, parsley, and green onions. It looks beautiful on a festive platter.
Smoky Cheese Ball: Add smoked cheddar and a little smoked paprika for a deeper flavor.
Mini Cheese Balls: Instead of shaping one large ball, divide the mixture into eight to twelve small portions. Roll each one in a different topping.
Cooking Science Explained
Why soften the cream cheese? Softened cream cheese blends much more easily. Cold cream cheese tends to remain in small lumps, making it difficult to create a smooth cheese mixture.
Why chill the cheese ball? Chilling firms up the fat in the cheese and butter, making the mixture easier to shape and helping it hold its round form.
Why coat it just before serving? If the cheese ball sits coated with nuts for too long, moisture from the cheese can soften the crunchy coating. Chilling the cheese ball first and adding the final coating closer to serving gives you the best texture.
Here is another little trick I love: wrap the cheese mixture tightly in plastic wrap before chilling it. You can gently shape it through the wrap without getting your hands covered in cheese.
Easy, Step-by-Step Recipe
Ingredients
- 16 ounces cream cheese, softened
- 1 1/2 cups freshly shredded sharp cheddar cheese
- 1/4 cup finely chopped green onions
- 1 small garlic clove, finely minced
- 1 tablespoon Worcestershire sauce
- 1/2 teaspoon garlic powder
- 1/2 teaspoon smoked paprika or regular paprika
- 1/4 teaspoon black pepper
- 1/4 teaspoon salt, or to taste
- 2 tablespoons sour cream, optional
For the Coating
- 3/4 cup finely chopped pecans
- 2 tablespoons finely chopped fresh parsley
- 2 tablespoons finely chopped green onions
- 1 tablespoon finely chopped fresh chives, optional
For Serving
- Assorted crackers
- Pretzel crisps
- Celery sticks
- Carrot sticks
- Bell pepper slices
- Cucumber slices
- Cherry tomatoes
Instructions
- Soften the cream cheese: Remove the cream cheese from the refrigerator about 30–45 minutes before preparing the recipe so it becomes soft enough to mix easily.
- Prepare the cheese: Shred the cheddar cheese if you are not using pre-shredded cheese. Freshly shredded cheddar usually gives a smoother mixture.
- Mix the base: Add the softened cream cheese and sour cream, if using, to a large mixing bowl. Beat with a hand mixer or stir firmly with a sturdy spoon until smooth.
- Add the cheddar: Mix in the shredded sharp cheddar until evenly distributed.
- Add the seasonings: Stir in the green onions, garlic, Worcestershire sauce, garlic powder, paprika, black pepper, and salt.
- Taste: Taste a small amount and adjust the seasoning. Remember that the crackers and cheese coating will also add flavor.
- Chill: Place a large sheet of plastic wrap on your work surface. Spoon the cheese mixture into the center and wrap it tightly.
- Shape: Use your hands to gently shape the wrapped mixture into a ball. Do not worry about making it perfectly round.
- Refrigerate: Chill the wrapped cheese ball for at least 2 hours. For the best flavor and easiest shaping, you can refrigerate it overnight.
- Prepare the coating: Combine the chopped pecans, parsley, green onions, and chives on a plate or shallow dish.
- Unwrap: Remove the chilled cheese ball from the refrigerator and carefully unwrap it.
- Coat: Gently roll the cheese ball through the nut and herb mixture, pressing lightly so the coating sticks to the surface.
- Chill again: Place the coated cheese ball on a serving plate and refrigerate it for another 30 minutes if you have time.
- Serve: Arrange crackers, pretzels, and fresh vegetables around the cheese ball. Add a small cheese knife or spreader and let everyone dig in.
Do not worry if the coating is not perfectly even. A homemade cheese ball should look inviting, not manufactured. If you see a bare spot, simply press a little more of the nut mixture onto it.
If the cheese mixture feels too soft to shape, put it back into the refrigerator for another 30–60 minutes. The colder it is, the easier it will be to handle.
If you want an extra-special presentation, place the cheese ball on a bed of fresh parsley and surround it with colorful vegetables and crackers.
Practical & Valuable Tips
- Storage: Keep the cheese ball refrigerated in an airtight container or tightly wrapped. For best quality, enjoy it within 3–4 days.
- Serving Ideas: Serve with crackers, crostini, pretzels, celery, carrots, cucumber, bell peppers, or apple slices.
- Substitutions: Use walnuts instead of pecans, Monterey Jack instead of cheddar, Greek yogurt instead of sour cream, or fresh chives instead of green onions.
Do not leave it out all afternoon. Because this appetizer contains dairy, keep it refrigerated until you are ready to serve and return leftovers to the refrigerator promptly.
Use a sturdy bowl. Cream cheese and shredded cheddar can become surprisingly difficult to mix by hand when the mixture is cold.
Shred your own cheese. It takes only a few extra minutes and can give you a smoother texture.
Make the coating colorful. A mixture of nuts, parsley, chives, and dried cranberries creates a beautiful party presentation.
Serve with different textures. Pair creamy cheese with crunchy crackers, crisp vegetables, and toasted bread for a much more interesting appetizer.
Make-Ahead & Batch-Cooking
This is one of my favorite make-ahead appetizers because the flavor actually benefits from a little time in the refrigerator.
You can make the cheese mixture the day before, shape it into a ball, wrap it tightly, and refrigerate it overnight. The next day, prepare the coating and roll the cheese ball just before serving.
If you are planning a large party, make several smaller cheese balls instead of one large one. You can give each one a different flavor.
For example, make one classic cheddar and pecan cheese ball, one bacon-jalapeño version, and one cranberry-herb version. Suddenly, one basic recipe becomes an entire appetizer selection.
Mini cheese balls are also wonderful for parties because guests can take one individually instead of cutting into a large ball.
If you are making the recipe ahead, keep the cheese ball refrigerated until serving. Set it out shortly before your guests arrive, then return leftovers to the refrigerator.
Eco-Friendly Kitchen Hacks
- Use leftover herbs before they wilt by chopping them into the cheese mixture or coating.
- Save small pieces of different cheeses and shred them together for a custom cheese blend.
- Use leftover nuts from baking projects as the coating.
- Serve fresh vegetables alongside crackers to add more variety without buying specialty snacks.
- Prepare one large batch and divide it into smaller portions for several gatherings.
- Store leftovers in reusable containers instead of disposable wrapping when possible.
This recipe is especially useful when you have little bits of cheese in the refrigerator. A small piece of cheddar, a little Monterey Jack, or some leftover pepper jack can all find a home here.
You can also use leftover fresh herbs. Parsley, chives, green onions, and even a little rosemary can work beautifully.
Pairing Suggestions
- Beverages: Sparkling water with lemon, iced tea, lemonade, apple cider, ginger ale, or a light fruit punch.
- Sides & Sauces: Crackers, toasted baguette slices, pretzels, vegetable sticks, apple slices, grapes, olives, and pickles.
For a holiday party, I love pairing the cheese ball with grapes, apple slices, and toasted baguette. The sweetness and freshness of the fruit balance the rich, savory cheese.
If you are serving it for game day, go heavier on the crunchy snacks. Pretzels, crackers, tortilla chips, and celery sticks make an excellent spread.
You can also create a simple appetizer board around the cheese ball with olives, nuts, dried fruit, sliced vegetables, and crackers. It looks impressive without requiring much additional cooking.
Frequently Asked Questions
- How far ahead can I make a cheese ball?
You can prepare the cheese mixture and shape the ball a day ahead. Keep it tightly wrapped and refrigerated, then add the crunchy coating closer to serving for the best texture. - Why is my cheese ball too soft?
The cream cheese may have become too warm, or you may have added too much liquid. Refrigerate it for several hours to firm it up. If necessary, mix in a little extra shredded cheese. - Can I make cheese balls without nuts?
Absolutely. Use chopped fresh herbs, shredded cheese, crushed pretzels, toasted seeds, everything bagel seasoning, or dried cranberries instead. - Can I make mini cheese balls?
Yes! Divide the mixture into small portions and roll each portion into a ball. Coat them individually and serve with toothpicks or small crackers.
Call to Action
If you need an appetizer that is easy, creamy, cheesy, and guaranteed to make people gather around the snack table, give this cheese balls recipe a try.
I love recipes like this because they do not require complicated cooking techniques. You mix, chill, coat, and serve. That is it!
And once you know the basic recipe, you can change it for every occasion. Make it spicy for game day, festive for Christmas, colorful for a birthday party, or simple for a family snack.
Save this recipe to your favorite Pinterest board so you can find it whenever you are planning a party or need a quick appetizer.
If you make your own version, share it with friends and family and let me know what you added. Did you use bacon? Jalapeños? Cranberries? A different cheese? I would love to hear about your favorite combination.
Bonus: Your Kitchen Notes
This recipe is practically made for kitchen experimentation, so use this space to record your favorite version.
Your kitchen note: Write down the cheese combination, coating, seasonings, and toppings you liked best.
Maybe you discover that smoked cheddar makes the perfect cheese ball for your family. Maybe walnuts become your favorite coating. Or perhaps you decide that adding crispy bacon and jalapeños creates the ultimate party appetizer.
You can also write down which crackers paired best with your version.
If you are making this for a holiday gathering, record how many guests one cheese ball served. That will make planning your next party much easier.
One of my favorite things about homemade cheese balls is that they never have to be exactly the same twice. The base recipe stays creamy and cheesy, but the flavors can change depending on what you have in the kitchen.
So do not be afraid to experiment.
Add a little spice. Try a new cheese. Change the coating. Add fresh herbs. Make mini cheese balls instead of one large one.
Most importantly, make it something you and the people around your table will enjoy.
Because at the end of the day, a good appetizer is not about making something complicated. It is about putting something delicious in the middle of the table and watching everyone reach for another bite.
And with this creamy, crunchy, flavor-packed cheese ball, I have a feeling that second bite will come very quickly.