Personalized Introduction
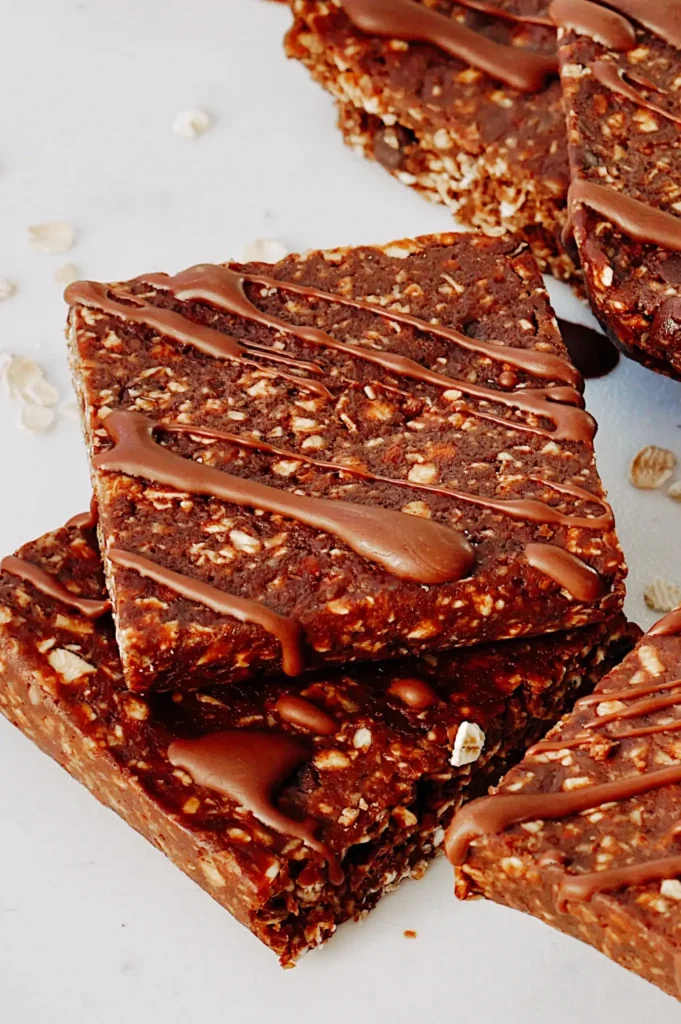
Whenever I’m craving something sweet but don’t feel like turning on the oven, these No-Bake Chocolate Oatmeal Bars are my first choice. They’re rich, chewy, chocolatey, and incredibly easy to make with simple pantry ingredients. Every bite combines buttery oats with a smooth chocolate peanut butter filling that melts in your mouth.
I first discovered this recipe during a hot summer when baking wasn’t an option. I wanted a homemade dessert that came together quickly and could chill in the refrigerator while I finished the rest of my day. These bars turned out even better than I imagined. They disappeared so fast that I immediately wrote the recipe into my collection of family favorites.
What I love most about these bars is their simplicity. You don’t need any special baking skills, fancy equipment, or hours in the kitchen. Just a saucepan, a mixing bowl, and a little patience while they chill. They’re perfect for lunch boxes, potlucks, holiday dessert tables, afternoon snacks, or whenever a chocolate craving strikes.
If you’re looking for a foolproof no-bake dessert that’s packed with chocolate flavor and satisfying texture, these No-Bake Chocolate Oatmeal Bars are sure to become one of your favorite homemade treats.
Recipe Origin & Story
No-bake desserts have been kitchen favorites for generations because they’re simple, affordable, and perfect for warm weather. Oatmeal bars became especially popular as home cooks looked for ways to create satisfying desserts using pantry staples like oats, butter, sugar, cocoa, and peanut butter.
Unlike baked cookie bars, these treats rely on melted butter and chilling time to create their signature chewy texture. The buttery oat mixture forms both the crust and topping, while a rich chocolate peanut butter layer sits perfectly in the middle.
The first time I made these bars was for a family picnic. I needed something easy to transport that wouldn’t crumble apart, and these were exactly what I was looking for. Since then, they’ve become one of my most requested desserts because they’re quick, dependable, and always disappear first.
Whether you’re making dessert for kids, friends, or simply treating yourself, these bars prove that delicious homemade sweets don’t always require an oven.
Ingredient Spotlight
- Main Star: Old-fashioned rolled oats create the chewy texture that makes these bars hearty, satisfying, and wonderfully rustic.
- Secret Boost: A pinch of flaky sea salt sprinkled over the chocolate layer enhances the chocolate flavor and balances the sweetness beautifully.
- Quality Tips: Use old-fashioned rolled oats rather than instant oats, good-quality semi-sweet chocolate chips, creamy peanut butter, real butter, and pure vanilla extract for the best flavor.
Nutritional Benefits
Although these bars are definitely a dessert, they contain wholesome rolled oats, which provide fiber and whole grains. Peanut butter contributes protein and healthy fats that help make each square satisfying.
Dark or semi-sweet chocolate contains naturally occurring antioxidants, while homemade treats allow you to control ingredient quality and sweetness compared to many packaged desserts.
Like most sweet treats, these bars are best enjoyed in moderation as part of a balanced lifestyle.
Adaptable Variations
- Dietary Swaps: Use certified gluten-free oats for a gluten-free version or dairy-free butter and chocolate chips for a dairy-free alternative.
- Flavor Twists: Add chopped pecans, walnuts, shredded coconut, mini marshmallows, caramel drizzle, espresso powder, or crushed pretzels for extra texture.
- Seasonal Spins: Add pumpkin spice during autumn, crushed peppermint during the holidays, fresh berries in summer, or toasted almonds for spring gatherings.
Cooking Science Explained
Although there’s no baking involved, a few simple techniques help create perfect bars every time.
Melting the butter with brown sugar allows the sugar to dissolve evenly, creating a smooth mixture that binds the oats together.
The peanut butter melts into the chocolate, producing a creamy filling that stays soft without becoming runny.
Finally, refrigerating the bars gives both layers time to firm up, making them easy to slice while maintaining their rich, chewy texture.
Pressing the oat mixture firmly into the pan also helps the bars hold together beautifully after chilling.
Easy, Step-by-Step Recipe
Ingredients
- 1 cup (225 g) unsalted butter
- ½ cup packed brown sugar
- 1 teaspoon vanilla extract
- 3 cups old-fashioned rolled oats
- 1 cup semi-sweet chocolate chips
- ½ cup creamy peanut butter
- 1 tablespoon butter (for chocolate layer)
- Pinch of flaky sea salt (optional)
Instructions
- Line an 8×8-inch baking pan with parchment paper.
- In a medium saucepan over medium heat, melt the butter with the brown sugar until smooth.
- Remove from the heat and stir in the vanilla extract.
- Add the rolled oats and mix until evenly coated.
- Press about two-thirds of the oat mixture firmly into the prepared pan.
- In a microwave-safe bowl, combine the chocolate chips, peanut butter, and one tablespoon of butter. Microwave in 20-second intervals, stirring until completely smooth.
- Spread the chocolate mixture evenly over the oat base.
- Sprinkle the remaining oat mixture over the chocolate layer and gently press it down.
- Finish with a light sprinkle of flaky sea salt if desired.
- Refrigerate for 2–3 hours until fully set.
- Lift from the pan, slice into squares, and enjoy.
Practical & Valuable Tips
- Storage: Store the bars in an airtight container in the refrigerator for up to one week.
- Serving Ideas: Enjoy with coffee, milk, hot chocolate, or vanilla ice cream.
- Substitutions: Almond butter, cashew butter, or sunflower seed butter work well instead of peanut butter.
- Cleaner Slices: Chill thoroughly before cutting and wipe the knife clean between slices.
- Extra Chocolate: Sprinkle mini chocolate chips over the filling before adding the top oat layer.
- Added Crunch: Mix chopped nuts into the oat mixture for extra texture.
Make-Ahead & Batch-Cooking
These bars are ideal for making ahead because they actually improve after several hours of chilling. Prepare them the night before a party, picnic, or holiday gathering, and they’ll be ready to serve the next day.
They also freeze beautifully for up to three months. Simply wrap individual bars in parchment paper and store them in an airtight freezer container. Let them thaw in the refrigerator before serving.
Keeping a batch in the refrigerator also makes it easy to enjoy a quick homemade dessert whenever a chocolate craving appears.
Eco-Friendly Kitchen Hacks
- Store leftovers in reusable glass containers.
- Buy oats in bulk to reduce packaging waste.
- Use leftover parchment paper for separating frozen bars.
- Choose locally produced honey or peanut butter whenever available.
- Prepare double batches to reduce energy and shopping trips.
Pairing Suggestions
- Beverages: Cold milk, hot coffee, cappuccino, iced coffee, hot chocolate, chai latte, or herbal tea pair wonderfully with these rich bars.
- Sides & Extras: Fresh strawberries, raspberries, vanilla ice cream, whipped cream, sliced bananas, or caramel sauce make delicious accompaniments.
Frequently Asked Questions
-
Can I freeze No-Bake Chocolate Oatmeal Bars?
Yes! Wrap the bars individually and freeze for up to three months. Thaw overnight in the refrigerator before serving.
-
Can I use quick oats instead of rolled oats?
You can, but old-fashioned rolled oats provide the best chewy texture and hold together more effectively.
-
Why won’t my bars hold together?
Make sure the oat mixture is pressed firmly into the pan and allow the bars to chill completely before slicing.
-
Can I make these without peanut butter?
Absolutely. Almond butter, cashew butter, cookie butter, or sunflower seed butter all make delicious alternatives.
Call to Action
If you’re looking for a quick, chocolatey dessert that’s simple enough for beginners yet delicious enough for every occasion, I hope you’ll give these No-Bake Chocolate Oatmeal Bars a try. They’re rich, chewy, incredibly satisfying, and perfect for everything from family snacks to holiday dessert tables.
If you make this recipe, I’d love to hear how it turned out! Share your favorite mix-ins, chocolate combinations, or creative toppings in the comments. Don’t forget to save this recipe and share it with friends and family who love easy no-bake desserts.
Bonus: Your Kitchen Notes
One of my favorite things about these bars is how easily you can customize them. Maybe you’ll add toasted coconut, drizzle caramel over the chocolate, sprinkle crushed peanuts on top, or mix mini marshmallows into the filling. Every variation becomes your own delicious signature dessert.
Use this section in your WordPress editor to record your favorite ingredient combinations, chilling times, or decorating ideas. Before long, you’ll have your own perfect version of these No-Bake Chocolate Oatmeal Bars that family and friends will request again and again.
Sometimes the easiest desserts become the most memorable, and these rich, chewy chocolate oatmeal bars are proof that a few simple pantry ingredients can create something truly irresistible.